
Create a stunning Safety Pin Christmas Tree using simple materials like safety pins, beads, and wire. This eco-friendly, space-saving DIY project is perfect for homes, offices, or gifts. Customize it with bead colors and sizes for a personalized touch.

Materials Needed
To create a Safety Pin Christmas Tree, you will need: safety pins, sunburst crystal beads, wire, a hot glue gun, floral tape, scissors, and a base or stand. These materials are essential for constructing and decorating your tree.
Safety Pins
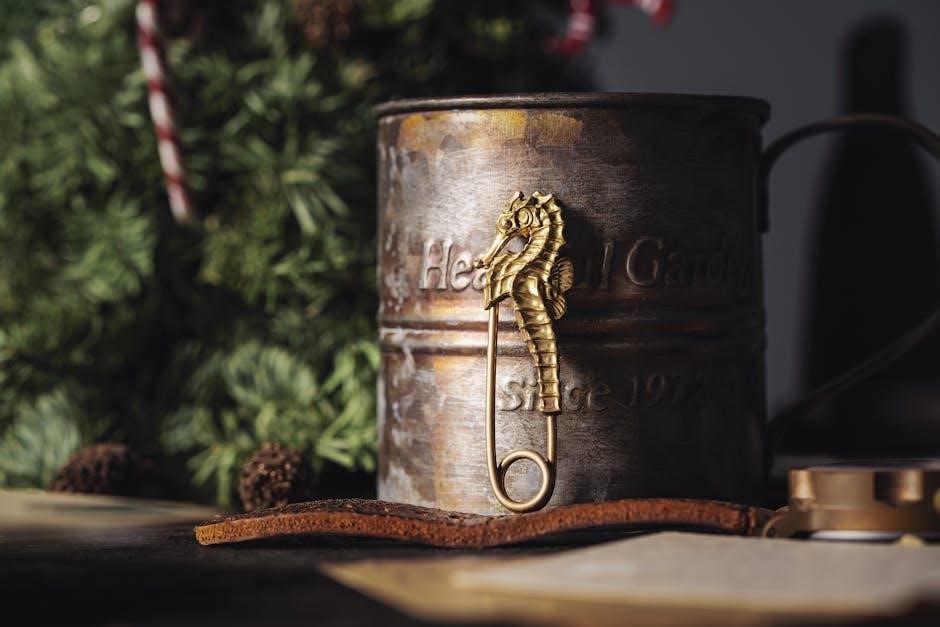
Safety pins are the foundational material for this craft. You will need approximately 80 safety pins, depending on the size of your tree. They come in various sizes and colors, such as gold or silver, which can add a festive touch. To use them, thread a bead onto the pin and close it securely. This process is repeated to create layers of the tree. The pins are then shaped and secured together using wire. For a uniform look, stick to one color, or mix and match for a unique design. Ensure the pins are tightly closed to hold the beads in place. This step is crucial for the tree’s stability and appearance. With patience, the safety pins will transform into a beautiful, intricate structure.

Beads
Beads are a key component of the Safety Pin Christmas Tree, adding color and sparkle to the design. You will need approximately 320 beads, depending on the size of your tree. Sunburst crystal beads, available in clear or green, are a popular choice for this craft. These 18mm beads provide a vibrant, festive look. For a more intricate design, you can also use faceted beads, which catch the light beautifully. Beads are threaded onto the safety pins, creating layers that form the tree’s shape. To secure them, simply close the pin after adding the bead. This process is repeated for each pin, building up the tree’s structure. Beads can be used in a single color for a uniform appearance or mixed for a multicolored effect. Experimenting with different bead sizes and colors allows for customization, making each tree unique. Properly securing the beads ensures the tree remains sturdy and visually appealing. This step is essential for achieving the desired aesthetic and durability of the final piece.
Wire

Wire is an essential material for constructing the Safety Pin Christmas Tree, as it provides the structural framework needed to hold the design together. A thin, flexible wire, such as copper or floral wire, is ideal for this project. The wire is used to string the safety pins and beads, creating the tree’s branches and shape. To begin, thread one end of the wire through the hole of a safety pin, leaving a small loop at the base. This loop will help secure the pin in place. As you add more pins and beads, the wire will form the layers of the tree. Once the desired shape is achieved, the wire is wrapped around the base or stand to hold the structure firmly in place. It’s important to ensure the wire is tightly secured to prevent the tree from toppling over. Additionally, the wire can be shaped and molded to create a natural, tree-like form. Properly handling the wire ensures the tree remains stable and visually appealing. This step is crucial for achieving the desired structure and durability of the final piece.
Hot Glue Gun
A hot glue gun is a crucial tool for assembling and securing the structure of your Safety Pin Christmas Tree. It is primarily used to attach the wire framework to the base or stand, ensuring the tree remains stable and upright. Before applying glue, make sure the base is clean and dry to ensure a strong bond. Apply a small amount of glue to the wire and press it firmly onto the base, holding it in place for a few seconds until the glue sets. Additionally, the hot glue gun can be used to attach decorative elements, such as a star or bead at the top of the tree, adding a finishing touch to the design. For safety, use a low-temperature glue gun to avoid damaging the wire or beads. Always handle the glue gun with care, as the nozzle and glue sticks can become extremely hot. By using the hot glue gun effectively, you can create a durable and long-lasting Safety Pin Christmas Tree that will withstand handling and display. This step is essential for completing the project and ensuring its stability. Proper use of the hot glue gun will make your tree both secure and visually appealing.
Floral Tape
Floral tape is a versatile material used to enhance the appearance and stability of your Safety Pin Christmas Tree. It is typically green in color, making it an ideal choice for blending with the tree’s design. The tape is used to cover the wire framework, concealing it from view and creating a more polished look. To apply the floral tape, wrap it tightly around the wire, overlapping the edges slightly to ensure full coverage. This step not only hides the wire but also helps secure the beads and pins in place, preventing them from shifting. Additionally, floral tape can be used to attach decorative elements, such as beads or small ornaments, to the tree. For a more realistic look, you can wrap the tape around the base of the tree to mimic the appearance of a real tree trunk. Floral tape is easy to work with and adds a professional finish to your handmade Safety Pin Christmas Tree. By incorporating floral tape into your design, you can achieve a cohesive and visually appealing final product. This material is essential for completing the tree’s structure and ensuring its durability.
Scissors
Scissors are an essential tool for crafting a Safety Pin Christmas Tree, as they are used to cut various materials during the assembly process. Sharp, precise scissors are recommended to ensure clean cuts, especially when trimming floral tape or excess wire. For cutting wire, heavy-duty scissors or wire cutters are ideal, as they can handle thicker materials without dulling easily. When working with floral tape, scissors are used to trim the tape to the desired length, ensuring it fits neatly around the tree’s structure. Additionally, scissors may be needed to shape or adjust the tree’s base or stand, ensuring it sits securely. It’s important to use caution when handling scissors, especially when cutting near flammable materials like floral tape. Keeping a pair of dedicated craft scissors on hand will help maintain precision and prevent damage to other tools. By having sharp, reliable scissors, you can efficiently complete each step of the project, ensuring a polished and professional-looking Safety Pin Christmas Tree. Proper use of scissors is crucial for achieving clean cuts and maintaining the integrity of the materials used in the design. This tool is indispensable for any crafter aiming to create a beautiful and durable Safety Pin Christmas Tree.
Base or Stand

A sturdy base or stand is crucial for stabilizing your Safety Pin Christmas Tree, ensuring it stands upright and remains secure. You can use a variety of materials for the base, such as a small plastic container, a wooden dowel, or even a decorative plate. For a more polished look, consider using a plastic clothes basket or a small, shallow container that fits the size of your tree. The base should be proportionate to the tree’s height to maintain balance and prevent tipping. To secure the tree to the base, you can use hot glue or floral tape, wrapping it around the bottom layer of pins and attaching it firmly to the base. This ensures the tree remains stable, especially if it’s placed in a high-traffic area or near children. Additionally, you can decorate the base with ribbon, tape, or small ornaments to match the tree’s aesthetic. A well-constructed base not only enhances the tree’s appearance but also ensures it remains safe and secure throughout the holiday season. By choosing the right base, you can enjoy your Safety Pin Christmas Tree without worrying about it toppling over. This step is essential for completing the project and showcasing your handmade craft proudly.
Step-by-Step Instructions
Begin by creating the tree structure, then add layers of safety pins and beads, shaping as you go. Secure the layers with wire and floral tape. Add a star on top and finish with decorative touches for a complete, elegant look.
Starting the Tree
To begin your safety pin Christmas tree, start by creating the base structure. Use a wire frame or a stand to shape the tree’s outline. Gather your materials, including safety pins, beads, and wire. Thread a safety pin onto the wire, followed by a bead, and repeat this process until you have five pins and beads strung together. Bring the wire ends together to form the tree’s base layer, ensuring it is secure and evenly spaced. This initial layer will serve as the foundation for building up the tree’s shape. Use floral tape to hold the layers in place as you progress. Make sure the base is sturdy to support the weight of the pins and beads. Starting with a solid foundation will make the rest of the process smoother and ensure your tree stands upright. This step sets the stage for adding layers and shaping the tree into its final form.
Adding Layers

Once the base of your safety pin Christmas tree is secure, begin adding layers to create the tree’s shape. Start by threading a safety pin onto the wire, followed by a bead, and repeat this process. Each layer should be slightly smaller than the one below it to achieve the tree’s tapered form. Use floral tape to attach each new layer to the previous one, ensuring a snug and even fit. As you add layers, gently shape the tree to maintain its balance and symmetry. Make sure the pins and beads are evenly spaced to create a full and cohesive appearance. For stability, secure each layer firmly to the base or stand. Continue this process, gradually reducing the size of each layer until you reach the top of the tree. This step-by-step layering technique will give your tree its signature shape and depth. Properly securing each layer ensures the tree remains sturdy and visually appealing.
Shaping the Tree

After adding the necessary layers, focus on shaping your safety pin Christmas tree to achieve the desired form. Gently bend the wire framework to create a natural, tapered shape, ensuring the tree stands upright and balanced. Use your hands to adjust the layers, spreading them evenly around the wire to maintain symmetry. For a more polished look, wrap floral tape around the stem, covering any exposed wire and securing the layers in place. This step not only enhances the tree’s appearance but also adds stability. Once the shape is set, fluff out the safety pins and beads to create a full, lush texture. Pay attention to the top of the tree, ensuring it is neatly rounded and ready for the final decorative touch—the star. Proper shaping ensures your tree looks professional and visually appealing, making it a standout piece in your holiday decor. This step requires patience but is crucial for achieving the classic Christmas tree silhouette.
Securing the Structure
Once your safety pin Christmas tree has taken shape, it’s essential to secure the structure to ensure stability and longevity. Start by applying a small amount of hot glue to the base of the tree, attaching it firmly to the stand or base. This prevents the tree from toppling over and provides a sturdy foundation. Next, wrap floral tape around the stem, covering any exposed wire and reinforcing the connection between the layers. This step not only strengthens the tree but also adds a professional finish. For added security, ensure the star at the top is tightly attached, either by gluing it in place or wrapping it with wire. Finally, inspect the tree to make sure all pins and beads are securely fastened. Gently tug on a few pins to verify they hold their position. Properly securing the structure ensures your tree remains intact and looks its best throughout the holiday season. This step is crucial for maintaining the tree’s appearance and preventing any parts from coming loose over time.
Adding the Star
The star is the crowning glory of your safety pin Christmas tree, adding a touch of elegance and completing the festive look. To attach the star, thread a piece of wire through the back of the star and wrap it around the topmost layer of the tree. Secure it tightly by twisting the wire, ensuring the star sits straight and level. For extra stability, apply a small dab of hot glue to the base of the star where it meets the tree. This ensures it stays in place even if the tree is moved. If using a starflake bead, thread it onto the wire at the top of the tree and wrap the wire around the highest pin layer to hold it firmly. Once the star is in place, fluff out any surrounding pins to create a seamless transition. The star not only adds a decorative finish but also catches the light, enhancing the tree’s sparkle. This step is the perfect way to give your tree a polished and professional appearance.

Finishing Touches
Once your tree is fully shaped and secured, it’s time to add the final details. Gently fluff out any pins that may have been flattened during the shaping process to ensure a full, even appearance. If using lights, carefully weave them through the layers of pins, starting from the bottom and working your way up. This adds a magical glow to your tree. For extra stability, apply a small amount of hot glue to the base where the tree meets the stand, ensuring it stays upright. Finally, wrap floral tape around the base to conceal any visible wire or glue, giving the tree a clean, polished look. You can also customize the base with decorative ribbon or fabric for a more festive appearance. These finishing touches will make your safety pin Christmas tree look professional and ready to display. With these final steps, your unique and eye-catching DIY project is complete!

Tips for Customization
- Choose bead colors that match your holiday theme for a personalized look.
- Add string lights for a glowing effect that enhances the tree’s beauty.
- Experiment with different pin sizes and shapes for added texture.
- Adjust the tree’s height and layer density to suit your space.
Bead Color
Bead color plays a crucial role in determining the aesthetic of your Safety Pin Christmas Tree. Green beads are a classic choice, creating a traditional tree appearance that blends seamlessly with holiday decor. For a more vibrant look, consider using clear or sunburst crystal beads, which add a sparkling, festive glow. Mixing bead colors can also create unique effects, such as alternating green and clear beads for a layered, dimensional look. If you prefer a bold statement, opt for red or gold beads to give your tree a pop of color that stands out in any setting. The choice of bead color allows you to customize the tree to match your personal style or complement your home’s decor. Additionally, using monochromatic beads in shades like silver or bronze can create a sleek, modern appearance. Experimenting with different bead colors is an excellent way to make your Safety Pin Christmas Tree truly one-of-a-kind. This flexibility ensures your DIY project reflects your creativity and festive spirit.
Adding Lights
Adding lights to your Safety Pin Christmas Tree can elevate its visual appeal and create a festive ambiance. String lights or fairy lights are ideal for this project, as they can be easily woven through the layers of safety pins and beads. Start by draping the lights around the tree structure, ensuring they are evenly distributed to highlight the intricate details of the pins and beads. For a more dramatic effect, place the lights closer to the base and work your way up, allowing the glow to emanate from within the tree. Battery-operated lights are recommended to avoid the risk of electrical hazards. To secure the lights, gently tuck the wires between the pins or use a small dab of hot glue to hold them in place. Be cautious not to overload the structure with too many lights, as this could make it unstable. Adding lights not only enhances the tree’s beauty but also makes it a standout piece in your holiday decor. This step allows you to add a magical touch to your DIY project, making it truly special.
Experimenting with Sizes
Experimenting with sizes is a great way to add a personal touch to your Safety Pin Christmas Tree. You can create a mini tree for small spaces or a larger one for a bold statement. Start by using smaller safety pins and beads for a delicate look or larger ones for a more dramatic effect. The size of the tree can also vary depending on the number of layers you add. For a taller tree, increase the number of layers, and for a wider tree, use more pins per layer. Additionally, you can mix different bead sizes within the same tree to create texture and depth. Smaller beads work well for intricate details, while larger beads can draw attention to specific areas, like the top or base. When experimenting with sizes, ensure the base or stand is proportional to the tree’s height to maintain stability. This flexibility allows you to customize the tree to fit your space and style, making it a unique and adaptable holiday decoration. Whether you prefer a compact design or a grand centerpiece, size variations offer endless possibilities for creativity.
Using Different Pins
Using different pins can add variety and creativity to your Safety Pin Christmas Tree. While traditional safety pins are the most common choice, you can experiment with other types of pins to achieve unique effects. For instance, decorative pins with intricate designs or colored heads can add a pop of color and texture to your tree. You can also mix and match different sizes of safety pins, using larger ones for the base and smaller ones for the top layers to create a gradient effect. Additionally, consider using straight pins or sewing pins for a more delicate look, though they may require more care to secure properly. When using different pins, ensure they are compatible with the beads and wire you’ve chosen to maintain the tree’s structural integrity. This customization allows you to tailor the tree’s appearance to your personal style or theme, making it a one-of-a-kind holiday decoration. By experimenting with various pin types, you can add depth, visual interest, and a personal touch to your Safety Pin Christmas Tree. This flexibility makes the project even more enjoyable and adaptable to different preferences and settings.